Thursday, November 20, 2014

Smashed Potatoes

This mashed potato recipe stemmed from me realizing at the green age of 16 that if I was cooking the potatoes, they should taste exactly how I dream they should.  And yes, I dream about potatoes, but only around the holidays. Unfortunately for my guinea pig siblings and hubs, the recipe wasn't just there, it took me a while to get it right.

So here they are, my dreamy and buttery potatoes, just in time for Thanksgiving. Now just to warn you, these potatoes aren't healthy, so if you're on paleo (I'm sorry!), maybe come back to the blog in January and we can chat about fauxtatoes (made from cauliflower, actually really good!) but here at D & H for the holidays, we don't like to worry about all that.  

Here is what you need to make about 6 cups of mashed potatoes:
2 tablespoons chicken bouillon 
1 tablespoon chopped garlic 
6 peeled potatoes (I just got the cheap-o ones from Costco)
1 stick of butter
8oz cream cheese 
salt to taste


Fill a 6 quart pot about 1/3 full of water, add the garlic and bouillon and crank up the stove heat to high.

Chop the potatoes. 
Dump the potatoes into the pot of seasoned water. 
Oh, you know what, I threw some thyme into the pot to make sure that the growings of our garden were put to good use.  (Side story: D and I installed a drip system into one of the raised garden beds in our backyard.  Fabulous idea, worked out beautifully except I planted vegetables that neither of us really like to eat and I don't always cook with (doi right?), not the desired outcome of a DIY project, let me tell ya!  So anytime I can use things from the garden, it is a happy day here!)

Bring the water to a boil and let the potatoes cook in the boiling water until you poke them and they fall apart (like me every thirty days or so), the potatoes should cook in about 20 minutes.

Drain the water.  Chop the cream cheese and butter into chunks and add it to the potatoes. Did I mention that this isn't a healthy recipe?   
I then used a whisk to mix in/melt the cheese and butter and to smash the potatoes, you can also you an electric mixer for this, I needed to work on my triceps anyway, so I went the elbow grease route.  I also added about a teaspoon of salt to the potatoes as I was mixing them. 

Voila. I turned into Forrest Gump for a minute before this post, "I ate some". 

A few notes: 
1) I am a potato purist.  I don't want crunchy, herb-y or any unidentifiable objects in my potatoes, I want them smooth, flavorful and fluffy.  Often flavorful and smooth don't mix but if you use the boiling water as the method for seasoning the potatoes, I think you get the best of both worlds.  So you like rosemary but don't want to feel like you are eating pine needles? Throw the rosemary in the water as the potatoes cook, pull it out when you are done cooking them, BAM ZOOM, good to go!  My non-negotiable item in this recipe is using chicken bouillon, it gives the potatoes flavor that is noticeable but not overpowering.  

2)The gorgeous cutting board shown above was actually scrap granite from a job D was working on, he sanded the rough edges and we stuck some felt pads to the bottom of it.  I leave it on the counter all the time, so useful having a cutting board at the ready and it protects the maple countertop!  I'm so glad he keeps his eyes out for cool "scraps" like that!

Well I hope you all have a fabulous week and are having as much fun planning Thanksgiving and enjoying this wonderful snuggle weather as much as we are!   

All the best, 
D & H


Saturday, November 15, 2014

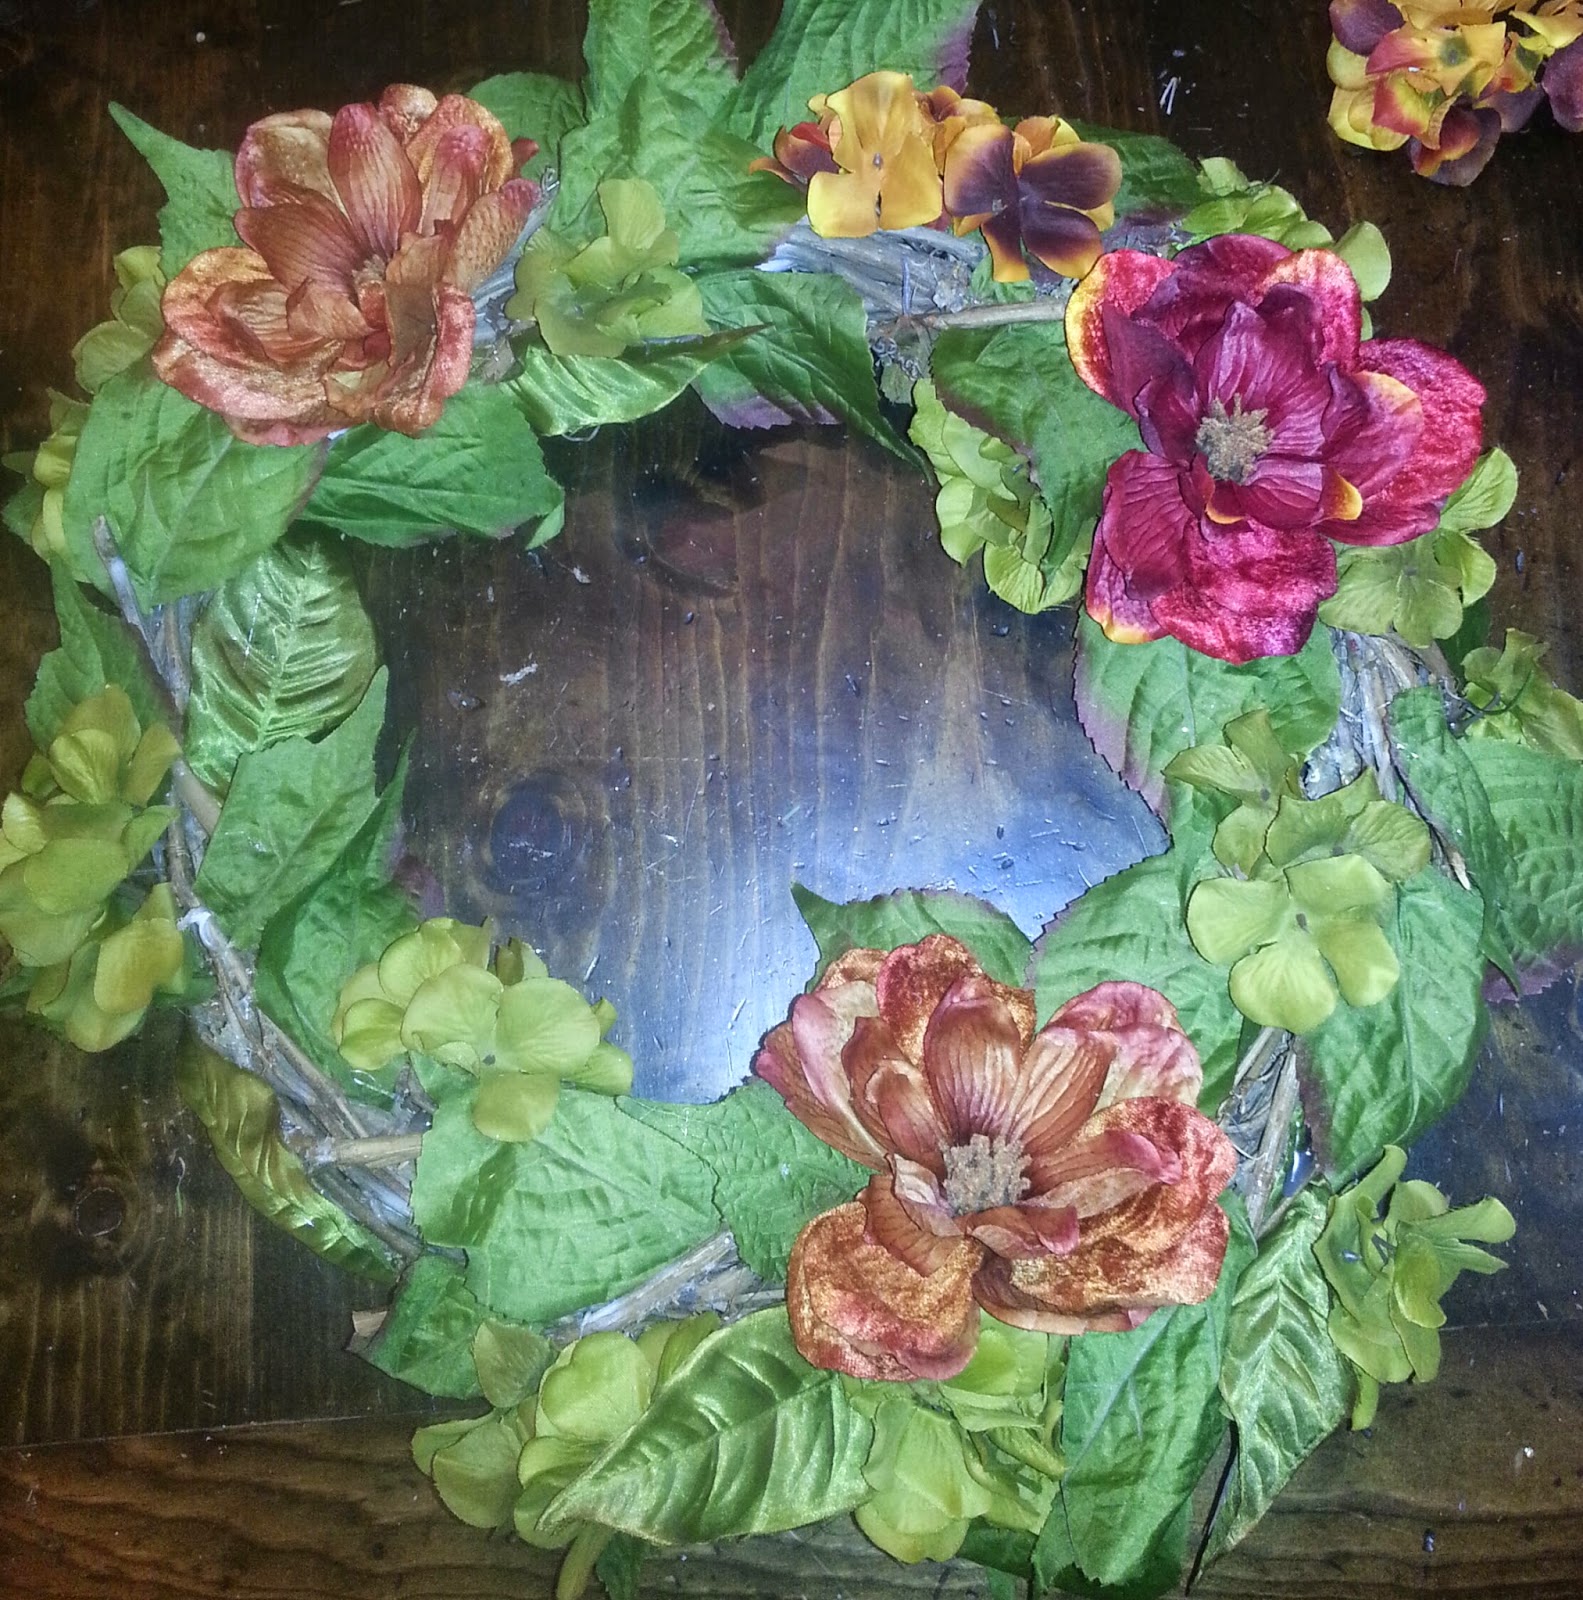
Fall Flower Wreath

With Thanksgiving mere days away and the inspiring colors of Autumn brightening the cool air like a roaring fire, it is time for our fall wreath to go up.  

Last year I made this pine cone wreath - my gorgeous, prickly little thing.  
After we moved the wreath was mangled beyond recognition (packing is not my strong suit), so I thought I should remake it as a fall flower wreath, but I have to be honest, now that I see the pine cone wreath photo, I wish I would've just remade the same wreath. 

Now that is just not something I say everyday - less flowers, more pricks.  

But oh well, this is about the flower wreath.  So here is what I used, all of which came from Michael's, the total cost (since I already owned the hot glue gun) was just under $25:
3 "statement" flowers
1 twig wreath
2 hydrangea flower bunches (different colors) 
1 sprig branch
mini hot glue gun
bag of mini glue sticks

I started by ripping off all the green leaves from the flower bunches.
Then I glued all of those to the wreath. 
Next I added one of the hydrangea colors.
Then I started to add the other hydrangea color and realized I wanted to place the "statement" flowers.
Next I added the rest of the hydrangeas. 
Not looking that impressive, I know.  Time to add variety to the wreath - here come the sprigs. 
Yeah, those will do.  

The wreath was still looking kind of boring to me so I added a pine cone (I should call this post "pining for pine cones") to see how it would look.    
That definitely added some dimension, so I glued on a couple more. 

There it is - done & done.   
Yep, we have an orange fence (painting is for the spring), still think I should've stuck with the pine cones, lesson learned; always stick with what works! 

Hope you have a great week and take some time to stop and enjoy the flowers...or the pine cones! 
~D & H   


Friday, November 7, 2014

Chunky Cable Knit Infinity Scarf DIY

I saw a photo of THE dream chunky scarf a few weeks ago...layers of off white happiness cascading over the model's neck like a big, fluffy hug and I just had to make one! 

So today, I debut this knot-ball of happiness. 

Now, the trick to getting the scarf to be so chunky is to knit with three skeins of yarn at the same time.  As you can see, it turns into a little bit of a cat's cradle situation if you don't keep your yarn in order.  

I crammed the project into my purse a few times so I could sneak in time to work on it here and there, this resulted in lots of knots and a minor blush explosion/scarf scrub session, so I don't recommend that.  Other than that this scarf went fairly smoothly - although knitting with three skeins sounds intimidating, once you get the hang of it, it is manageable.   

What I used: 
I used 3 skeins and picked the color because it just screamed my name.  No really, it did. 

I picked these because the stub on the bottom of the needles helps keep all the stitches on the needle, I did a loose stitch on this scarf so the stub was a must for me.  Plus, how cute are they in gold?

The total cost for me was just under $20.

Now for the how to:   
  • Cast on 25 stitches 
  • Row 1: knit 4, purl 6, knit 5, purl 6, knit 4 
  • Row 2: purl 4, knit 6, purl 5, knit 6, purl 4
  • Repeat rows 1 & 2 five times
  • Row 11: knit 4, purl 6, knit 5, purl 6, knit 4 
  • Row 12: purl 4, move next 3 stitches (stitches 5-7) off left hand needles, knit next 3 stitches, put stitches 5-7 back on left hand needles, knit 3 stitches, purl 5, move next 3 stitches (stitches 16-18) off left hand needles, knit next 3 stitches, put stitches 16-18 back on left hand needles, knit 3, purl 4.  Oh hey boo, you just made your first cable! 
  • Rows 1-12 repeat until you are almost out of yarn.  
  • Cast off. 
  • Turn scarf inside out and sew the ends together.  
  • Drape around your neck & get cozy! 
A note:
If this is your first rodeo with a cable knit, I would recommend doing a little trial run with only one skein of yarn to get used to the stitch, a few rows should get you comfortable.  

For this trial run the cable will be created from the 4 stitches in the middle portion and since this is just for practice it doesn't really matter if you create the cable after 5 rows or 10 rows just as long as you get used to making it, make the cable using a knit stitch, get a feel for how much play in the yarn you need so that you don't accidentally drop the stitches but mostly the trial run is just so you don't send me hate mail for suggesting that you make the scarf with three skeins instead of just one!

To make a trial run like the photo below: 
  • Cast on 10 stitches
  • Row 1: knit 3, purl 4, knit 3
  • Row 2: purl 3, knit 4, purl 3
  • Repeat rows 1 & 2 five times
  • Row 11: knit 3, purl 4, knit 3
  • Row 12: purl 3, move next 2 stitches (stitches 5-6) off left hand needles, knit next 2 stitches, put stitches 5-6 back on left hand needles, knit 2 stitches, purl 3
  • Rows 1-12 until you feel comfortable with the pattern and your needles  


Here is a quick tutorial for a cable knit, she uses an extra needle so that the stitches aren't just stranded out in space (which is what I do), but just do what works for you.   
  

Hope you have fun week creating & enjoying this beautiful season of the year!  
~D & H

Thursday, November 6, 2014

Hi!


Welcome to our blog!

This is me, I'm Heather

and this is my husband Donald


This year we bought our first home in beautiful northern California and are in the exciting, exhausting and seemingly endless stages of fixing it up.  He is a carpenter and I love interior design, so the possibilities seem endless!  

His creative process is methodical and calculating while mine is brash and fearless.  His finished work shows his craftsmanship and attention to detail, while mine is just, well finished - it's funny how the balance of our personalities naturally plays out in our projects!  

I've wanted to share some of our DIY projects on a blog but only in a way that it would add to the substance on the web, not the clutter.  

Something I don't want to add to the web is a shop - we create things because we love the process and we love the results.  It's fun coming home after work and investing our time and creativity in things that inspire & challenge us, that make our home special, that make unique gifts and that give us time together to learn and grow - the kinds of things that you can't buy at a store. 

So here it is, our blog of vetted projects.  Our bad ideas.  Our good ideas.  Someone else's good ideas that we tried to make.  Someone else's bad ideas that we wish we were warned about.  Probably some occasional pictures of our dog Laila because she is just so darn cute.  

I know right?

Everything on this blog is ours, and we want to encourage you to make it, and make it yours!
~D & H